
VK email related services are mainly divided into three categories: VK account bound email (for account security and notifications), VK Mail client (multi email management tool), and VK WorkSpace enterprise email (business solution).
VK account binding email (mandatory settings)
1. The function of binding email
Account security: used for login verification, password retrieval, two-step verification backup
Notification reception: Receive VK messages, friend requests, activity notifications, etc
Identity verification: Enhance account credibility and reduce the risk of being restricted
2. Detailed steps for binding/changing email (mobile version)
Open the VK main application ->click on the avatar in the upper left corner ->settings (gear icon)
Select Account and Security → VK ID Settings → My Information
Find the primary email address in the contact information → click on add/change
Enter email address → click to send verification code
Check email verification code and enter → Complete binding/change
3. Detailed steps for binding/changing email (web version)
Login to vk.com → Click on the avatar in the upper right corner → Settings
Select basic information → enter a new email address in the email address bar
Enter VK account password to confirm identity → click save
Check your email verification code and click on the confirmation link → Complete setup
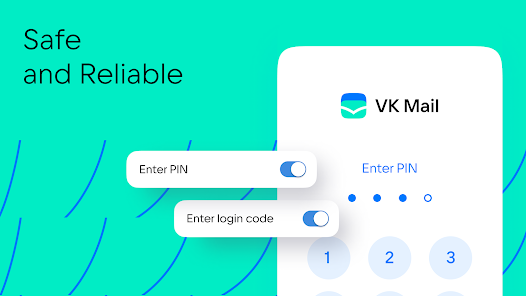
4. Email security precautions
Privacy Protection: After binding, the email will be displayed in a partially hidden format (such as c * * * @ mail. com) to protect personal information
Cannot unbind directly: can only replace the current bound address by changing the email address
Verification Importance: Unverified email may result in restricted account functionality. It is recommended to complete verification immediately
Basic usage tutorial
Add email account
Open VK Mail → Click on Account → * *+* * button
Select email type (Mail.ru/Gmail/Other)
Enter email address and password → Authorize access
Complete the settings to manage the email in the application
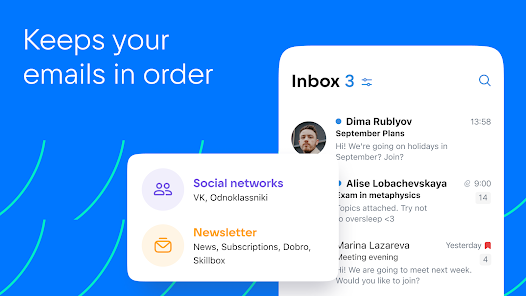
Intelligent classification function usage
Click on the bottom folder → View the automatically created categories by the system (such as social, news, promotions)
Long press the email → select move to folder → customize classification rules
Click on Settings ->Filter Rules ->Create Advanced Filter Conditions (such as by Sender, Subject)
Quick operation skills
Right swipe: marked as read/unread
Left swipe: Delete/Archive emails
Long press: Batch select emails for management
Pull down refresh: synchronize the latest emails